
 These days, the vision of home built swing sets can seem like a distance memory. It’s so common to see kids indoors glued to some sort of screen or mobile device. It can be a perfectly beautiful day, but somehow the temptation of the You Tube juggernaut or other social platform can hijack the attention span of little ones rendering them immobile.
When I was young, spending a great deal of times indoors to ‘play’ with a tablet, was simply unheard of. Most non-millennials will attest to this. Sure we played board games indoors and what not, but there’s no doubt, a great amount of our leisure time was consumed in our beloved backyards. It’s a past time that now struggles to compete in the flashy, fast paced, digital age we’ve come to accept.
If backyards have any chance of luring tiny feet off the couch, then there needs to be some sort of carrot to sweeten the deal. In this DIY example, the carrot is literally dangling and beckoning so much fun. Of course I am referring to the humble swing and how it’s timeless appeal is well worth investing into today’s world. Kids big and small still adore them and they’re perfect for encouraging good mental and physical development. 
In this example below, Ill show you how you can make a handy, mobile swing that you can take with you wherever you go in nature. It is designed compact and light enough so you can easily put it in a bag and set off with it on your next adventure. Of course you could leave it in your own yard too when it’s not joining you on your next family picnic.
Home Built Swings Sets – How to Make a Mobile Swing
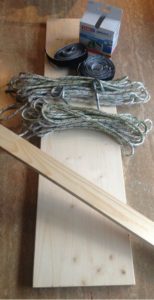 Materials
1 x spruce wood plate (1.7cm thick, 60cm long x 20cm wide)
1 x spruce wood slat (1 x 1.5m long, 4.5 chm wide and 1.2cm thick)
1 spruce wood slat (30cm long x 3.5cm wide)
1 x rope 0.5cm thick and 30m long
1 x hook and loop tape
2 x iron pleated hooks
2 x seat belt shoulder protectors
1 x wood glue and high pressure stapler
Step 1: Mark the Wood
- Take your plate and draw a cross from 20 to 50 centimetres. Draw the cross perfectly in the middle.
- Grab the 1.2cm thick slab and draw two pieces of 50 and two pieces of 20cm off from the wood. On the other slat you draw two x 4.5cm and four x 3cm long.
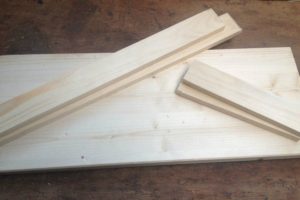
Step 2: Saw the Wood
- Saw the wood from the pieces you just marked. Make sure the ends of the slats are 1.2cm thick at an angle of 45 degree
Step 3: Drill in the Plates
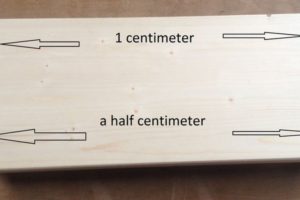
- Take the spruce wood plate and drill two holes from 1cm and 3cm from the sides.
- Drill two holes from a 0.5cm and 3cm from the sides through the plate.
- Next drill a hole from 1cm through the middle of two of the 4 cubes at 3cm high.
Step 4: Glue and Fix the Wood
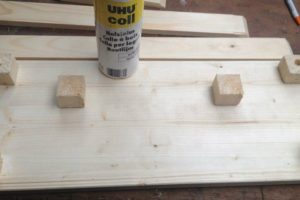
You now need to fix the wood together.
- Glue two pieces from 3cm high and 2 pieces from 4.5cm high – 1.2cm from the side.
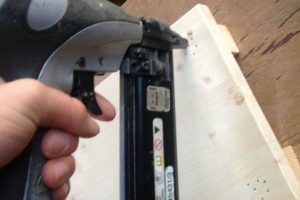
- Besides glue, it’s a good idea to fix them with a high pressure stapler.
- Next glue the other two pieces from 3cm high, 13 and 4cm from the sides.
- Also fix these pieces further with a high pressure stapler.
- Lastly take the slats from 1.2cm thick and fix them to the cubes with wood glue and the high pressure stapler.
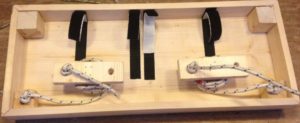
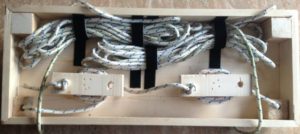
Step 5: Make the Winding System
You’re have your seat, it’s time to attach the rope for swinging. This system will be made under the swing.
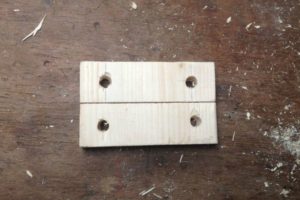
- First cut out the rest of the spruce wood plate – two pieces x 12cm long and 3.5cm thick.
- Drill 2 holes from 1cm through each piece – ensure this is 2cm from the sides.
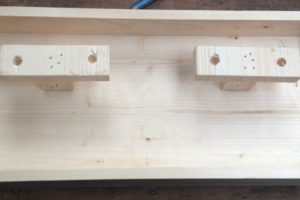
- After you have done this, fix each peace on a cube with wood glue and the high pressure stapler as shown in the photo.
Step 6: Screw the Iron Pleated Hooks Into the Plates
It’s almost time to use the swing. Yeehaa!
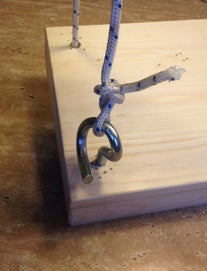
- Before you do, you’ll need to screw the iron pleated hooks into the plates. You have to do this in the two holes from a half centimetre.
- Next, cut the 30m rope evenly in half and fix each rope to an iron pleated hook. Do this with the artillery loop as shown in the photo.
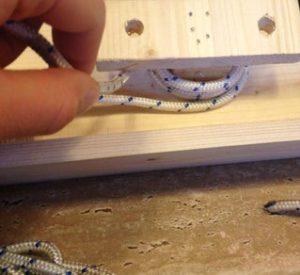
- After this, put the other ends of the ropes through the plates in the 1cm hole.
- Now turn the rope around the cubes and fix it with a carpenter stitch at the beginning where the rope enters through the plate.
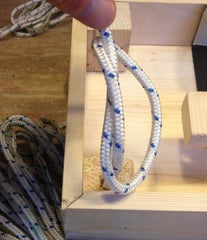
- Lay a loop at the end of the ropes after you turn them around the cubes.
- Lastly, take the hook and loop and tape and attach four pieces about the length of the plate. Next, take the adhesive side of the hook and loop and tape and attach the final four pieces.
- The surplus rope should fit in nicely.
- Finally, if you like you can finish the swing with some textured paint or leave bare for a rustic look.
Final Thoughts……
I must admit, I’m a sucker for a good swing and there’s no doubt, they add a lot of charm to our backyard. Don’t have a yard or a tree? You can always make one to use inside your house. Friends of ours have one in their playroom that they attached to a beam for support.
This clever contraption is sure to provide hours of fun!
Disclaimer: Please check all knots with your weight before allowing anyone to use it. Make and use at your own risk.
May this swing provide you with the same enjoyment and longevity it has done at our place!
Ash 🙂
Interested in other wood projects? Check out our other posts;