If you have just purchased a new dryer, you may be wondering how to install a dryer vent through a brick wall. Dryer vents are useful to release hot air and moisture outside. Plus, dryer vents can create a suction force that removes lint from clothes and allows air to circulate more effectively, so if you’re needing to install one through brick, our guide here will offer some tips to help you out!

First of all, for maximum efficiency, you’ll need to use the right tools and construction materials and carefully follow all instructions. You may want to check out some of our suggested Carpenter Tools, such as a Hammer Drill.
How to Install a Dryer Vent Through a Brick Wall – Step by Step Instructions
To Begin With – What You Will Need
- Narrow masonry chisel
- Hammer drill
- Cordless Drill
- 1/4-inch masonry drill bit
- Wire brush
- Safety glasses
- Hearing protection
- Thick work gloves
- Dust mask
- Caulking gun
- Carpenter’s pencil
- Shop vacuum
Step One: Personal Protection Equipment
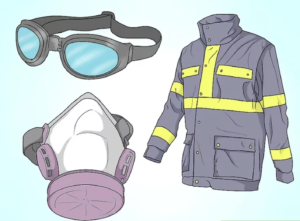
The first step when installing a dryer vent through a brick wall is wearing personal protection equipment. The protection gadgets are meant to protect you from any accidents you may encounter while carrying out your project.
To protect yourself effectively, you will need safety goggles, earplugs, musk, protective clothing, and footwear. When installing a dryer, you may expose yourself to risks such as injuries, respiratory complications, as well as health hazards in the workplace. When you have your protection gadgets all set, you can now proceed to the next step.
Step Two: Measure the distance between dryer and vent hood.
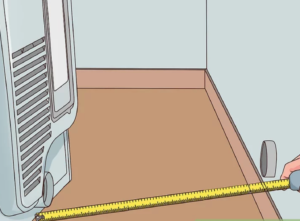
You’ll need to measure the path as if the hose were already assembled to account for any curves or bends. Jot down this measurement for later use (if you need to adjust the size of the hose that is – by cutting it down).
Step Three: Connect the hose to the back of the dryer
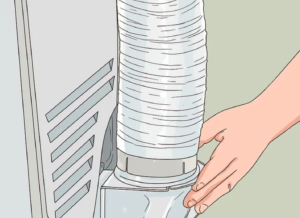
You may need to slide the dryer forward to access the rear exhaust pot. Next, slide the bottom end of the hose, or the lower elbow piece, over your dryer’s rear exhaust port. If the connection seems loose, secure the seam with foil tape or a hose clamp.
Step Four: Location For Dryer Hood
To determine the perfect location to install your hood, choose a strategic position, convenient for the dryer. Just gaze around the room where dryer is and search for a spot as close to the dryer’s exhaust port as possible.
Choose an interior location made from material that you can cut through, like plaster, wood, vinyl, or aluminum. If you only have an interior brick wall, the process is the same – but you’ll need to use a hammer drill fitted with a masonry bit. Remember to check both sides of the wall (including the outside brick wall) ensure there are no obstructions on either end.
Step Five: Trace the vent hood on the interior and exterior wall
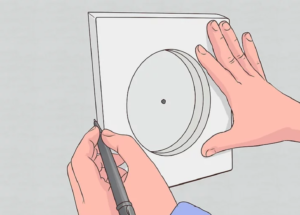
Once you’re set on a location, place the pipe portion of your vent hood over the center of the test hole and trace the outside using a pencil. Make sure to repeat this process on both the inside and outside of your house.
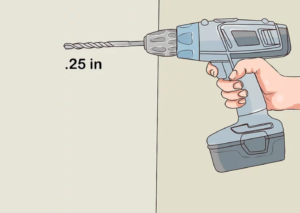
Step Six: The exterior vent
After choosing a strategic location to install your dryer vent, you now need to make a vent hole. Use the marker to draw a four and a quarter inch diameter circle on the wall. You will cut the wall through this circle to make the vent hole. Using the masonry bit, drill a pilot hole where your vent’s center part will be located.
Step Seven: A Vent Hole
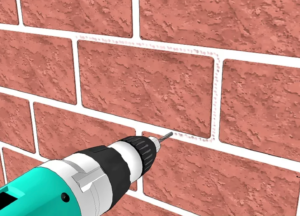
Similarly, draw a four and a quarter inch diameter hole in the outside wall guided by the center hole you have created. Examine the position of the vent cloak to ensure it is clear from the ground. If this is not the case, you can alter the center hole to accommodate the vent cloak.
In such a case, all you need to do is adjust the out drill bit to a four and a quarter inch masonry, and brick hole saw kit measurement. You then slowly and carefully cut the hole, pausing from time to time to pull out dust from the bit. Continuously repeat this process until the vent hole is completely through the brick wall.
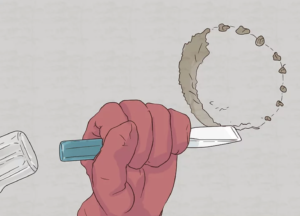
You’ll also want to ensure that the hole’s circumference is smooth and there is no obstacle while drilling the vent hole. Although some use a proper hole saw kit, really a hammer and chisel to create the holes is fine.
You’ll need to create a series of small holes around the vent hood template. Next stick a cold chisel into each hole and hit the back of the chisel with a hammer, to break and remove the material.
Pro Tip: If you’re getting rid of stucco, you’ll need to remove the wire mesh backing as well.
Finally, just repeat this until you reveal the wood frame beneath.
Step Eight: Install the Vent Hood inside the home near the dryer

With the vent hole ready, you can begin installing the vent hood and duct. Fit in the vent hood through the vent hole and fasten it with the appropriate size screws. You will have to drill screw holes into the brick wall to use in locking the dryer vent for maximum efficiency.
After fitting the vent hood and installing the vent cap, slide the ducting’s remainder to the dryer vent from inside. Some building mandatories and regulations require you to install a rigid metal duct within the wall to comply with the building’s constructional structure.
The rigid metal duct is made of a smooth interior surface that enhances the lint and airflow.
Step Nine: Place the dryer vent cover on the external opening of the hose pipe outside your house.
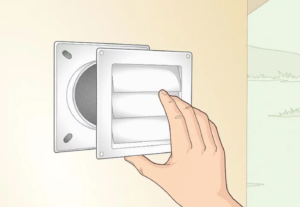
Your dryer vent hose connects to a short section of pipe that goes through the wall and sends air from your dryer to the outside. Push the round opening of your new dryer vent cover onto the rim of this pipe until it sits flush against the exterior wall.
Pro Tip: Dryer vent covers and hoses have a 4 in (10 cm) standard opening, so you shouldn’t have any problem fitting your cover onto the pipe at the end of the hose.
Step Ten: Fasten the vent cover

Place 1 screw into each of the 4 holes in the 4 corners of the dryer vent cover, then use an electric drill to drive them into place in the wall.
Pro Tip: Your dryer vent cover may or may not come with mounting screws of the correct length. If not, you can use something like 2–3 in (5.1–7.6 cm) long screws. Therefore, as long as the screws are long enough to pass through the cover and about 1 in (2.5 cm) into your wall, it will be very secure.
Step Eleven: Caulk and Finish Openings

To finalize the process, caulk through the wall with a waterproof silicone caulk designed for indoor and outdoor purposes. Scrape away any excess caulk using a thin-edged plastic utensil, such as a plastic putty knife or even an old bank card. It’s important to do this to create a water proof seal to keep rain water and moisture out.
Tips on How to Install a Dryer Vent Through a Brick Wall
- Remember to choose a visible position for security and repair purposes. Also, keep in mind that the location you choose should not be far from the dryer’s position inside your house.
- During the vent hole location search, make sure the path between the vent dryer and the dryer hole is straightforward, ensuring that the vent passes through the nearest possible distance with the least curving.
- You’ll also need to ensure that the vent installation’s opening point is between joists and studs for more efficiency.
Remember, if you’re into woodworking and are looking to build out your collection of tools, you may want to check out our guide on Wood Cutting Machines for Home Use.
Lastly, although installing a dryer vent through a brick wall (or even a plaster one) can seem like a daunting process, if you take one step at a time, it’s a straight forward process that you only need to do once (unless you move to a new location without a dryer vent!) It is important to do the job properly and to remember that the vent will need to be cleaned as lint and other debris can really build up. It certainly does with my boys washing! Depending on how often you use your dryer, you may need to clean it every 3 – 6 months.
Interested in our other articles?
How Does a Pneumatic Nail Gun Work