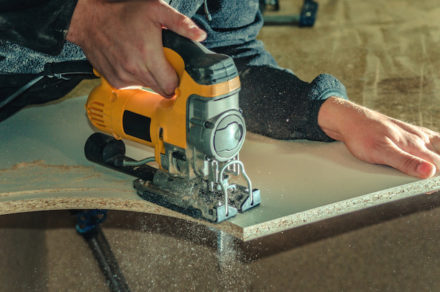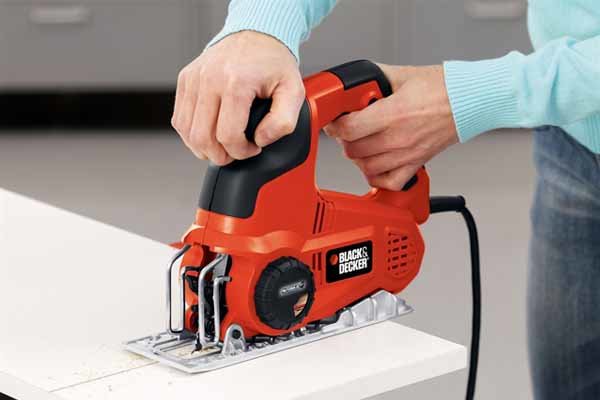
If you’re wondering, how to use a jigsaw, we have some tips here to help you out.
jigsaw power tool is a versatile machine that can cut through wood, metal, laminate and PVC. Although it can make straight cuts, it’s speciality are curved, intricate designs and patterns that would be too tricky for other saws. It is highly important though to select the right blade for the right material you are working with in order to make a smooth cut.
How to Use a Jigsaw
Step 1: Select Your Blade
Find out what type of blade you will need and what type of blade your jigsaw will accommodate (either U-shank or T-shank blades).
Blade Options: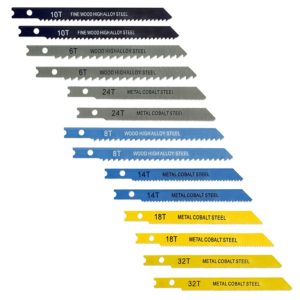
- Carbon Steel blade for wood and PVC
The most common type for jigsaws are carbon steel. This type will cut through wood, PVC of laminate.
- Bi-metal blade for thin metal
As metal is harder than wood, you need a tough blade. Select a blade that is purposefully designed to cut metal
- Fine-toothed blade for neat cuts
Fine toothed blades have more teeth per inch and give a clean and accurate cut on metal and clean edge on wood. They work best when used on slower speeds so they don’t break.
- Coarse blade for speed
Coarse blades have less teeth. They will leave a rough surface and will chip wood.
 Step 2: Put safety measures in place and set up your work space.
Once you have selected the right blade for the job, it is time to ensure your workspace is suitable to begin your cut.
- Plug in the cord and make sure it can reach all the areas you need to cut.
- Whenever you are not using the jigsaw, unplug it so you or a child won’t accidentally turn it on.
- Consider the use of a dusk mask and safety googles. You will want to protect your face from flying debris that jigsaws make. Sometimes material can kickback towards you and you really won’t want this in your eyes.
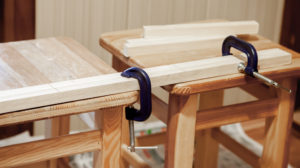
- Secure your timber or other materials with a clamp so it doesn’t move around (unless you’re on a vertical surface as this won’t need clamping).
- Make sure the area you intend to cut extends over the work surface. I recommend 2 C-clamps to hold it in place. If you haven’t got this, put a heavy object on the opposite end. You don’t want it to move and mess up on your line of cutting.
- Tip: if you need to cut a hole in the centre of your material, try putting it between two saw horses so you won’t damage the work itself.
Step 3: Draw your line of cut with a pencil
- It’s easy to cut up your material if you are following along a line. To do this neatly use a staightedge or compass and simply trace out the line you want your jigsaw to follow.
- Tip: when you make your cut, follow along the outside of the mark as you don’t want to accidentally overcut your material and restart from scratch.
Step 4: Start your saw
- Squeeze the trigger underneath the handle on the top of the saw
- Pull the trigger and keep it down until your finished your cut.
- A lot of jigsaws have a lock switch next to the trigger. If yours has this, press this down to save you holding it down the whole time.
- Adjust the speed with the dial located on the front of your machine. The blade will move faster with a higher number – so don’t turn it up too fast until you’re ready. You still need to keep a steady hand.
What Speed Should I Use?
Slow speeds are good for metal or PVC so it doesn’t melt the material. Fast settings are good for wood or laminate as it reduces the number of vibrations while you’re cutting.
How to Make Different Jigsaw Cuts
- Use a guide blade through the material you’re cutting. You should start at the edge of the material and slowly push the blade through it. Start slowly ensuring you are follow the line you want to cut.
- Keep the shoe (or base plate) flat against the material you’re cutting. This will ensure you’re making a straight line. Continue guiding the saw until you completely cut through the material.
- Tip: don’t force the blade through the material too hard otherwise it will break – just let the machine do the work for you. Also ensure fingers are away from the saw while your cutting as you won’t want to chop those!
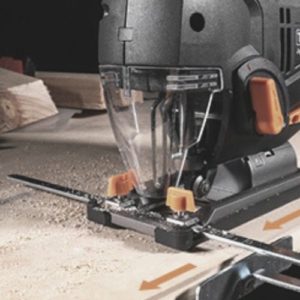 Make Straight Cuts With Metal Guide and Rip Fence
- Step 1: Check and ensure the edge of the board is smooth and straight
- Step 2: Adjust the base. Make sure the saw blade is sitting at a right angle to it
- Step 3: Determine the cutting line and add the metal guide to the jigsaw base (keep the metal guide against the straight edge of the board). Make any adjustments to the position of the guide
- Step 4: Simply push the jigsaw along the straight edge to make straight cut
- For laser and LED light adjustment, make sure the laser is in line with the saw blade.
- For Bevel Angle Adjustment – unscrew the nut of base with an Allen wrench
- Select the desired angle and make adjustments
- Be sure to tighten the nut with an Allen wrench until the jigsaw is secure
Make Curved Cuts By Turning the Back of the Saw
- Use a fine-toothed blade and set the speed to the slowest setting. Carefully guide your saw along the curve you’re cutting out. Importantly you’ll need to turn the back of the saw in the opposite direction of where you want the blade to go.
- If you have already drawn up curved lines in your material this will help. As you work through the curve, the material that falls out will relieve the pressure on the blade.
Make a Miter Cut by Adjusting the Angle of the Saw’s Shoe
- Pick up your saw and look for a screw underneath or at the back of the shoe. Turn it counterclockwise to loosen it.
- Adjust the angle of the shoe to match the angle for your cut. Simply tighten the screw and secure it in place. Put the shoe flat against the material you’re cutting. Your blade should now be at the right angle you’ll need for your cut.
- Miter cuts are popular when you need to make a 45-degree angle to create clean joints between wood.
Make a Cut in the Middle of Your Material
- To make a cut in the middle of your material (eg space for a vent or outlet) it is best to start with a drill. This will allow to make starting and stopping points for cutting a hole without cutting in from the edge.
- Tip: start with a drill bit that’s slightly bigger in circumference to the width of your saw blade.
- Drill a hole in each corner of the area you want to cut out. Put the saw blades through one of the holes and turn the saw on. Simply follow the outline of the area you’ve marked out to cut towards one of the other holes you drilled. From here just work from hole to hole until you’re finished with your cuts.
Final Thoughts……
At the end of the day it is important to remember that jigsaws excel in cutting wood and metal and are probably the only portable power tool that can effectively cut curves. They really are a must have for any woodworker who wants to get the job done fasting than using a coping saw. With the right blade fitted, they can cut wood with varying thickness and density.
I’m a big fan of jigsaws and have written a couple of reviews of the most popular jigsaws on the market and the best value ones for less than $100. I am not paid to write these reviews, so the really are written from my honest opinion of these saws.
As always, we encourage you to do some research on finding the right tools and the right advice to assist you with your woodworking needs.
Looking for other products? Check out our review guides on:
Pocket Hole Jigs by Kreg
Bench Grinders for Woodworking in 2019
What is a Miter Saw used for?
What to look for when buying a Circular Saw
The Best Cordless Drill Brand
